Adding a New Individual Resource to a Resource Group
This topic will guide you through the process of adding a new Individual Resource to an existing Resource Group. You must be logged into iTopia as the system user in order to complete the steps outlined in this topic.
- To walk through an example of this procedure, please see step 4 in the Creating a New System View topic.
This topic assumes that you have already created a new system view and you now want to add that view to an existing Resource Group.
- Signed on as the system user, open the Resource Master-Group Item view by:
- Entering resource_group in the Search field and then clicking Go.
OR - Selecting 'Resource Master-Group Item' from Master Tables menu found under the User Management System (UMS) on the main menu.
- Entering resource_group in the Search field and then clicking Go.
- Click Create on the Resource Master-Group Item view (found in the bottom right corner of the view).
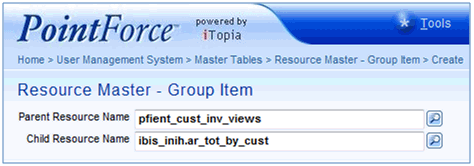
- A new Resource Master-Group Item view opens. There are 2 blank fields:
- Parent Resource Name - enter or select from the lookup the Resource Group name you want to be the Parent resource. This is the folder that will contain the Individual Resource(s) and/or other Resource Groups.
- Child Resource Name - enter or select from the lookup the Resource Name (Individual or Group) that you want to appear under the Parent Resource Name.
Here is an example of the 'Resource Master-Group Item' view:

Adding an Individual Resource to a Group Resource
- Parent Resource Name - enter or select from the lookup the Resource Group name you want to be the Parent resource. This is the folder that will contain the Individual Resource(s) and/or other Resource Groups.
- Click Continue.
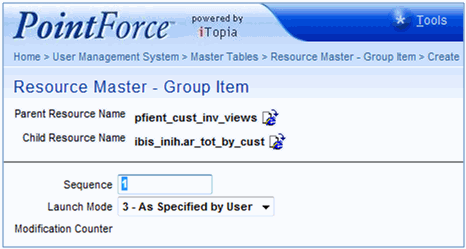
- A second Resource Master-Group Item page displays. This page contains 2 fields that require input:
- Sequence - enter the sequence number in which you wish the Child Resource to be displayed within the Parent Resource. If this is a new Group Resource (Parent Resource), the sequence number defaults to 1. As subsequent Child Resources are added to the Parent Resource, the sequence number automatically increases. Once several Child Resources are added to a Parent Resource, you can re-sequence the children as required.
- Launch Mode - select from the drop down list the desired Launch Mode. The Launch Mode controls how the view is launched in the browser when the view is selected. The default Launch Mode is '3-As Specified by User'. This option defaults to the Launch Mode set by the user's browser settings, but can be overridden by selecting either '1-In Same Window' or '2-In Separate Window'.
Here is an example of the second 'Resource Master-Group Item' page:

Selecting a Sequence and Launch Mode
- Sequence - enter the sequence number in which you wish the Child Resource to be displayed within the Parent Resource. If this is a new Group Resource (Parent Resource), the sequence number defaults to 1. As subsequent Child Resources are added to the Parent Resource, the sequence number automatically increases. Once several Child Resources are added to a Parent Resource, you can re-sequence the children as required.
- When the information is entered, click Submit.
- You are returned to the Resource Master-Group Item page that contains the Parent and Child Resource Name fields. At this point you can continue to add Child Resources to the Parent Resource or close the Resource Master-Group Item view.

