Shipping Entry (PS41)
Print Lables in PS41 with TMS
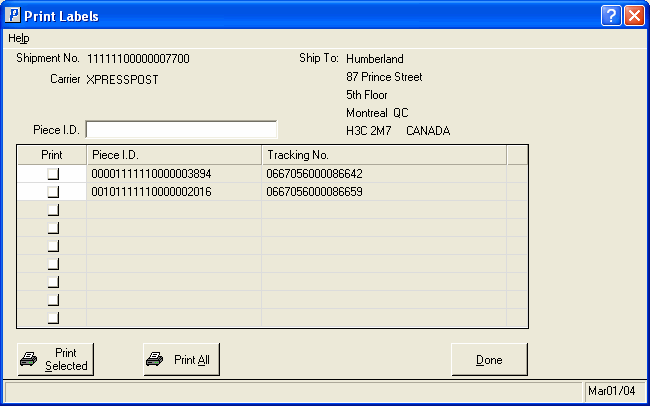
The Print Labels screen in the TMS portion of Shipping Entry (PS41) allows you to print Carrier Labels for the entire Shipment or for individual Cartons or Pallets within the Shipment.
Note: The Print Labels screen automatically opens to print Carrier Labels if Auto Print is set to 'Shipping Entry' in Maintain Operator Controls (PS11) for the Operator logged into Enterprise. The Shipper must have access to the Label Printer.
- The Shipment No. identifies the Shipment for which the Carrier Labels will print. This field cannot be modified.
- The Ship To address for the Shipment Number displays. This field cannot be modified.
- Scan or enter a Carton ID or Pallet ID in the Piece I.D. field. This allows you to verify that the Carton ID or Pallet ID is in the Shipment. This is an optional step.
- As you scan, a single label prints and the check box for the corresponding scanned ID is automatically selected.
- In the Print column of the list box, you can select the individual Carton or Pallet Carrier Labels you want to print.
- Once you have selected all of the Piece I.D.s to print, click Print Selected and only the selected Piece ID Carrier Labels will print to the printer identified in Maintain Operator Controls (PS11) for the Operator logged into Enterprise.
- To print all of the Carrier Labels for the Shipment, click Print All. The Carrier Labels print to the Printer identified in PS11 for the Operator logged into Enterprise.
- The Carrier Labels print in the order that the Cartons were weighed in (i.e. Weigh Sequence) to simplify the process of matching labels to Cartons.
- When you have completed printing the Carrier Labels for the Shipment, click Done to close the Print Labels window and return to PS41.

TMS Print Carrier Label

