Sales Rep Invoice Copy Print (IN51)
The Print Sales-Rep Copy (IN51) prints the Sales Rep's copy of the Invoice with commission details printed line by line. IN51 prints in Sales Rep/Invoice number sequence for the Primary Salesrep only.
For additional details on the report and the calculations used, click here.
The 'Salesman' sequence is used to periodically print a batch of invoice copies for a Sales Rep, for example weekly or monthly. The driving file for the report is the Sales Rep Reprint file. This file is updated if the Sales Rep is set up in Maintain Support Tables (SU09/Sales Rep) with the Invoice Copy Required check box selected. It contains a record for each invoice processed for that Sales Rep until those records are cleared after entering the Acceptance Codes for IN51, i.e. the Sales Rep Reprint file contains the list of invoices to be reprinted since the last time IN51 was printed and accepted in this sequence.
The 'Salesman History' sequence prints in the same format, showing commission details, but can be used to reprint Sales Rep copies of any invoice at any time. This sequence prints directly from the Invoice History file. For example:
- If you are investigating a specific invoice for commission purposes, enter the Sales Rep (for a length of 8 characters which is the 'Rep Group' plus the 'Sales Rep' code) + Invoice Number in the From/To Range fields.
- If Sales Rep copies are required for a Sales Rep that is not flagged in SU09 or if the Sales Rep Reprint file has already been cleared, then enter the Sales Rep in the From/To Range fields and enter the desired Date Range in Restriction 1.
Warning: If you use 'Salesrep History' as the sequence, be sure to select the 'Date Range' Restriction in order to avoid printing ALL invoices for the Sales Rep(s) specified in the From/To Range.
Follow these steps to print IN51:
- Select the Printer, Fax and/or E-mail to which you want to print the report on the E-mail/Fax/Printer Selection screen and click OK. (You can select Print and E-Mail destinations at the same time.)
-
Note: If you select the E-mail option, the E-mail Address must be entered in SU09/Sales Reps.
- The Report Parameters screen automatically opens:
- The Format field defaults to 'Print Salesman Copy'. You cannot modify the Format field.
- Select a Sequence from the drop down list. Valid options include:
- Salesman
- Salesrep History
- If a new New Page for each Break is required, select the checkbox.
- The Levels list box defaults displays the various Levels of detail available for the report. The levels predefined for IN51 are:
- Detail Line
- Report Total
- Select the Restrictions that apply to this print job by double clicking on the line in the list box. Restrictions allow you to tailor IN51 to your specific needs. The '>' before a Restriction indicates the Restriction is selected. Once a Restriction is selected, it can be de-selected but the '>' remains. An '*' before a Restriction means the Restriction is mandatory. IN51 includes the following Restrictions:
- Date Range - by selecting this option, you can set the Start and End dates for the report. Only Invoices within this date range will print.
Note: Once the Date Range Selection screen is open, you cannot exit without entering a date range.
- Date Range - by selecting this option, you can set the Start and End dates for the report. Only Invoices within this date range will print.
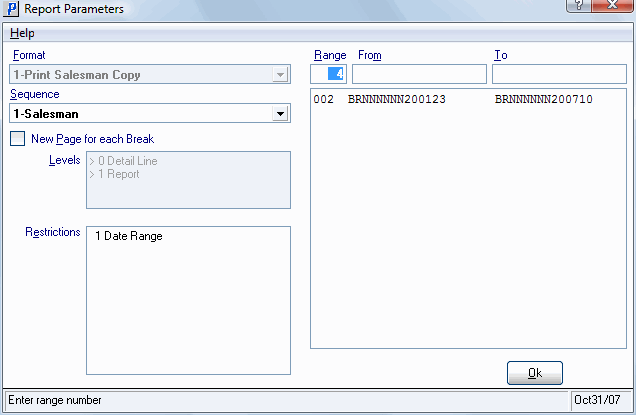
- Select the Range From and To for the report. The Range must match the Sequence selected; if, for example, the Sequence is Salesman, you must enter Salesrep codes in the To and From fields.
Tip: When running the 'Salesrep History' report, you can enter a Salesrep code + an Invoice number to print a specific Invoice or a range of Invoices and for a Sales Rep. For example, you can enter "GRJANICE2001234" where "GRJANICE" is the 'Rep Group' plus the 'Sales Rep' code and "2001234" is the Invoice number. Note: The Sales Rep Code (Rep Group plus Sales Rep code) must be 8 characters in length; include 'spaces' if necessary.
- In the From field, enter the starting 'code' for the report.
- In the To field, enter the ending 'code' for the report.
- The information displays in the list box below.
- To add additional Ranges, repeat these steps.
Note: To print the entire file (all Sales Rep codes), simply tab through the From and To fields. The list box displays *Start and *End in the From and To fields.
- To delete a Range from the list box, double click on the line. The following message displays, "Do you wish to delete this range? Yes/No". Click Yes to delete the range.
- In the From field, enter the starting 'code' for the report.
- When all of the information on the Report Parameters screen is complete, click OK to run the report.
- The Format field defaults to 'Print Salesman Copy'. You cannot modify the Format field.
- The Report Complete screen opens when the report is generated. Enter the Acceptance Codes that appear on the first and last page of the Report and click OK to accept the report, click Restart to restart the printing of the report or click Abort to cancel the report.
Print Sales-Rep Copy
