G/L Chart of Accounts Print (GL02)
The Chart of Accounts (GL02) program prints a listing of the GL Account codes. The report may be a useful tool when designing and maintaining reports in Maintain Report Parameters (GL05).
- The Printer Selection screen automatically opens. Select the device destination and click OK.
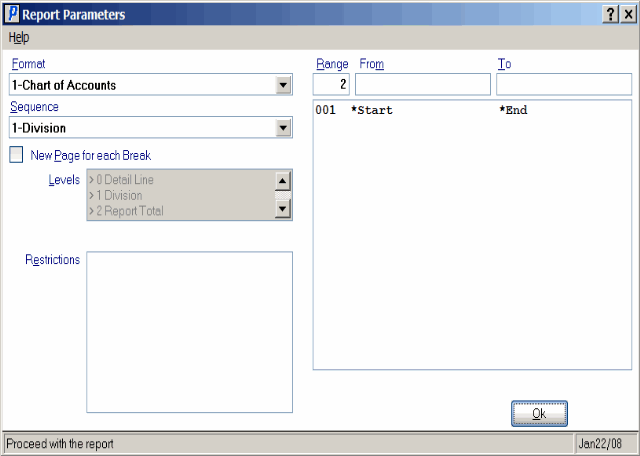
- The Report Parameters screen for GL02 opens.
- The Format field has two options from which to select:
- Chart of Accounts - this is the default option. The Chart of Accounts produces a detailed report of the selected Range, including any defined Header Accounts above the group of accounts they represent.
- Chart of Accounts (Summary) - produces a summary report that lists only the Header Accounts.
- Chart of Accounts - this is the default option. The Chart of Accounts produces a detailed report of the selected Range, including any defined Header Accounts above the group of accounts they represent.
- The Sequence field has two options from which to select:
- Division - the Division sequence sorts GL Account codes by Branch/Division and then by GL Account Number, i.e. it lists all Accounts within a Branch/Division (e.g. BBTAAAA sequence).
- General Ledger Account - the General Ledger Account sequence sorts the GL Account codes by GL Account Number first and then by Branch/Division, i.e. it lists all Divisions for an Account (e.g. TAAAAABB sequence).
- Division - the Division sequence sorts GL Account codes by Branch/Division and then by GL Account Number, i.e. it lists all Accounts within a Branch/Division (e.g. BBTAAAA sequence).
- If a New Page for each Break is required, select the checkbox.
- The Levels list box displays the various Levels of detail available for the report. All Levels are automatically selected in GL02; the '>' before each Level option indicates the Level is selected. GL02 includes the following Levels:
- Detail Line
- Division/GL Account Code
- Report Total
- Report
- There are no Restrictions that apply to the Chart of Accounts Report.
- Select the Range From and To for the report. The Range must match the Sequence selected. Multiple Ranges may be entered.
- In the From field, enter the starting 'code' for the report.
- In the To field, enter the ending 'code' for the report.
- The information displays in the list box below.
- To add additional Ranges, repeat these steps.
Note: To print the entire file (for example, all Division codes), simply tab through the From and To fields. The list box displays *Start and *End in the From and To fields.
- To delete a Range from the list box, double click on the line. The following message displays, "Do you wish to delete this range? Yes/No". Click Yes to delete the range.
- In the From field, enter the starting 'code' for the report.
- When all of the information on the Report Parameters screen is complete, click OK to run the report.
- The Format field has two options from which to select:
- The Report Complete screen opens when the report is generated. Enter the Acceptance Codes to accept the report (if applicable), click Restart to restart the printing of the report, or click Abort to cancel the report.

Print Chart of Accounts (GL02)
