A/P Vendor Statuses (AP61)
The Vendor Status Report (AP61) is used to help assess whether the freight rates set up in Maintain Purchasing Info (PO13) are reasonable. You may also decide to monitor the dollar volumes on Vendor accounts as an aid to negotiating better payment or freight terms from a Vendor.
The Vendor Status Report prints one line for each AP Vendor on file and reports the following:
- Vendor Code and Name
- Discount Terms Code or Number of Days for Discount (Number of Days are indicated by an '*' on the report)
- Net Terms Code or Number of Days for Net Due (Number of Days are indicated by an '*' on the report)
- Date of the last purchase
- Total purchases month to date (i.e. 'Current' Period open)
- Total purchases for the last 12 months (i.e. 12 months prior to 'Current' Period open)
- Total last year purchases
- Total balance outstanding on each account
- Percent freight to purchases for the last 12 months
Follow these steps when running AP61:
- The Printer Selection screen automatically opens. Select the device destination and click OK.
- The Report Parameters screen for AP61 opens.
- The Format field defaults to 'Vendor Status Report'. You cannot modify the Format field.
- In the Sequence field, select one of the following options from the drop down list:
- Vendor Code
- Vendor Name
- If a New Page for each Break is required, select the check box.
- The Levels list box displays the various Levels of detail available for the report. All Levels are automatically selected in AP61; the '>' before each Level option indicates the Level is selected. Double click on the line to remove the selector. AP61 includes the following Levels:
- Detail Line
- Report Total
- There are no Restrictions that apply to AP61.
- Select the Range From and To for the report. The Range must match the Sequence selected. Multiple Ranges may be entered.
- In the From field, enter the starting 'code' for the report.
- In the To field, enter the ending 'code' for the report.
- The information displays in the list box below.
- To add additional Ranges, repeat these steps.
Note: To print the entire file (e.g. all Vendor Codes), simply tab through the From and To fields. The list box displays *Start and *End in the From and To fields.
- To delete a Range from the list box, double click on the line. The following message displays, "Do you wish to delete this range? Yes/No". Click Yes to delete the range.
- In the From field, enter the starting 'code' for the report.
- When all of the information on the Report Parameters screen is complete, click OK to run the report.
- The Format field defaults to 'Vendor Status Report'. You cannot modify the Format field.
- The Report Complete screen opens when the report is generated. Enter the Acceptance Codes to accept the report (if applicable), click Restart to restart the printing of the report, or click Abort to cancel the report.
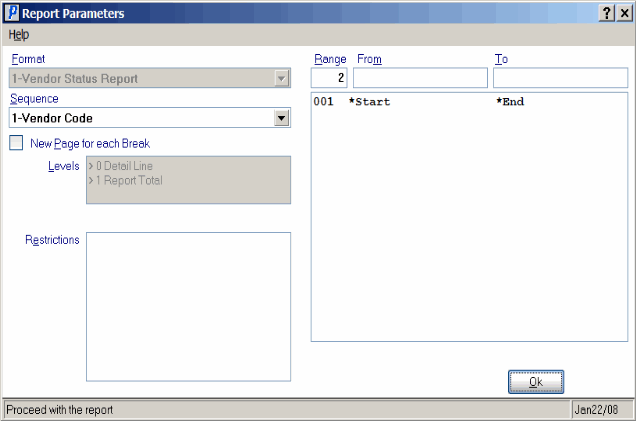
Vendor Status Report Parameters screen (AP61)
