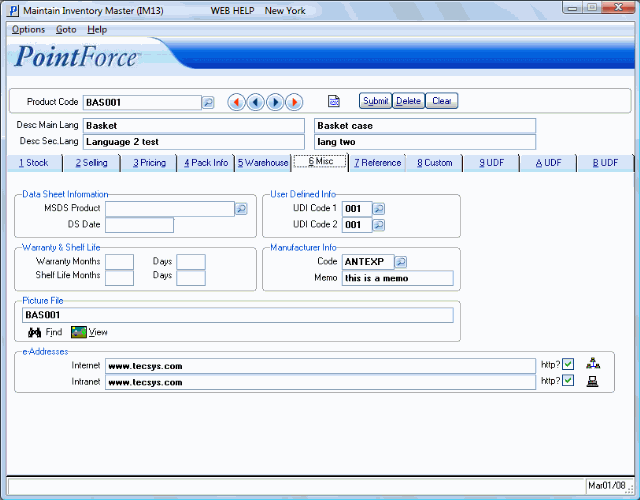
Miscellaneous Folder (IM13)
|
Additional Information Header |
The Miscellaneous folder contains information related to the Data Sheet, warranty, shelf life, picture file, email addresses, and manufacturing of the Product selected in the Header record. The list below defines every field on the Misc. folder:
Data Sheet Information:
- MSDS Product - Material Safety Data Sheets (MSDS) are required for items classified as dangerous goods. Note: If the product entered in the header section is a DP type product, then the MSDS product field is unavailable.
If the product is a dangerous good with an MSDS that is to be delivered with the goods:
- Enter or select from the query a product for the MSDS. If you enter a product in this field that is not flagged as type DP, the following error displays: "This product is not a data sheet, please re-enter. OK".
- When the dangerous good is sold to a customer for the first time, a product detail line is automatically added to the order for the MSDS so that it is picked along with the rest of the order. If the customer orders the dangerous good again, the Data Sheet is sent again IF the data sheet has been modified or if the customer has not received the Data Sheet in the last 3 years.
- For additional information on Material Safety Data Sheets, click here.
- Enter or select from the query a product for the MSDS. If you enter a product in this field that is not flagged as type DP, the following error displays: "This product is not a data sheet, please re-enter. OK".
- DS Date - stores the publication date or revision date for an MSDS. This field applies to products with a 'DP' type only.
- This date is used by Order Entry (OE30) to determine whether or not a Data Sheet is to be sent to a customer when ordering dangerous goods.
- A Data Sheet is sent the first time a customer orders the dangerous good or, with subsequent orders, if the Data Sheet has changed since the last time the customer received it or if the customer has not received a Data Sheet in the last 3 years. This is determined by comparing the Sales Order date to the DS Date on the MSDS master file record (IM13).
- This date is used by Order Entry (OE30) to determine whether or not a Data Sheet is to be sent to a customer when ordering dangerous goods.
Warranty & Shelf Life:
-
The Warranty and Shelf Life fields are applicable to Serial Number or Lot controlled products that are covered by a Warranty or have a Shelf Life expiration date. You have two options when entering the Warranty and Shelf Life for the product: you can enter the number of months or the number of days; you are not required to enter both.
- Warranty Months
- you can enter the Warranty period expressed in months, for example a 2 year warranty is entered as 24.
- Days - you can enter the Warranty period expressed in days, for example a 3 month warranty is entered as 90.
- Shelf Life Months - you can enter the Shelf Life expressed in months, for example a 2 year shelf life is entered as 24.
- Days - you can enter the Shelf Life expressed in days, for example a 3 month shelf life is entered as 90.
When a Serial Number Controlled product is sold, the value in the Warranty field (months or days) is used to calculate the Warranty expiration date. If this value is "0" (meaning it is not covered by a warranty), then any report that allows you to include or exclude expired Warranties will consider these Warranties expired because the Warranty date and the date of sale are the same.
The Shelf Life values are used to calculate the expiration date of a product and are for display only.
Picture File:
- Add a picture of the product to Enterprise. The product picture feature is available in Enter Orders/Quotes (OE30), Enter Invoices/Direct Bills/Credit Notes (IN41), Enter Cash Counter Invoices (RS41) and in Display Product Availability (IC45).
- The picture file must be in the PICTURES folder within the Enterprise directory. If you have any difficulties locating this folder, contact your System Administrator for network and directory locations specific to your installation of Enterprise.
- If the picture filename matches the product code, then you do not have to enter the filename in the Picture File field. Enterprise automatically links the picture file to matching product code. For example, the product code is 12345 and the picture of this product is 12345.bmp, then you do not have to identify the filename in this field; Enterprise automatically checks the PICTURES folder and displays the correct picture.
- If the picture filename is different from the product code, use the Find icon to locate and select the appropriate picture file from the PICTURES directory. Once the filename is in the Picture File field, the correct image will display for this product.
- You can test the link by clicking on the View Product Picture icon in OE30, IN41, RS41 or IC45.
- Product Pictures can print on Order Confirmation forms (OE30) and Print Sales Quotations (OE31) if the Enable Order Confirmation Pictures and Enable Quote Pictures fields are selected respectively in CC00/Order Entry.
Note: The recommended format for the picture file is .bmp or .jpg format. You may use .gif images but bitmaps and jpegs are recommended.
Note If your Enterprise Server is Unix or Linux based, the picture file must be entered in lower case. For more details on Unix or Linux, see Adding Product Images/Info.
If you want to see the picture of the product in the iTopia Products view (ibis_ici1), please see the Image Locations for PFE 6.1/6.2/6.3 help topic for details.
e-Addresses:
-
You can create hyperlinks to the page(s) on the Internet or your Intranet that relate to this product. When you enter an address, an icon appears beside the field:
- For Internet, the
 icon displays.
- For Intranet, the
 icon displays.
- Internet - enter the location of your Internet web page for this product. For example, the location www.yourcompany.com/products/bas001.htm represents the path to your web site that displays the web page for the product BAS001.
The Internet field can also be set up to work with the 'Internet Address Prefix' field in Maintain Company (CC95). In CC95, the base URL is entered for the location of all Products, leaving only the hyperlink to this Product to be entered here. For example, the exact web page you want to point to is http://www.tecsys.com/products/baskets.html. In the CC95 'Internet Address Prefix' field, you enter http://www.tecsys.com/products/ which is the base URL or the Prefix Address for all Products, and in this field enter baskets.html.
- Intranet - enter the location of your Intranet web page for this product. For example, the location MyServer/Intranet/Products/bas001.htm represents the path to your internal web server and a web page that provides information about the product BAS001.
The Intranet field can also be set up to work with the 'Intranet Address Prefix' field in CC95. In CC95, the base URL is entered for the location of all Products, leaving only the hyperlink to this Product to be entered here. For example, the exact Intranet page you want to point your staff to is http://www.intranet.com/products/wirebasket.html. In the CC95 'Intranet Address Prefix' field, you enter http://www.intranet.com/products/ and in this field enter wirebasket.html.
- http? - It is not necessary to prefix the URL with http:// as the system checks the address and adds http:// if this checkbox is selected. If you do not have an http server running on your local area network you can use the e-Addresses to access file-based html pages by not selecting the http? checkbox. Then, configure the e-Addresses with the UNC address to the file, for example, //MyServer/Intranet/Products/1001.htm.
- Link Test Icons - once you enter an e-Address, an icon automatically appears. Click on the icon here in IM13 and test the hyperlink you have created.
When set up, these icons display on OE30, IN41 and RS41 to link you to the web page or Intranet site related to the Product. In IC45, you can link to the web page or Intranet site by selecting the 'Web Page' or 'Intranet Page' option under the 'More' menu.
This feature can assist your sales staff in locating a web page for a Product a customer is referring to and can provide a quick link to your Intranet where you can store information on how to sell, use or support the product.
User Defined Info:
- The two User Defined Info (UDI) fields are optional. UDI Codes are defined in Maintain User Defined Info (IM11). The UDI Codes invoke templates, and the templates can be set up to display 'hard coded' text, or to allow 'open' text to be added at the product level. If the UDI template has 'open' text, the Operator adds the specific text to the template in IM13.
- When Sales Orders are entered in OE30, IN41 or RS41 for the product. The information entered in UDI Code-1 is available by clicking on the UDI
button on the Lines folder in OE30, IN41 or RS41.
- When Sales Orders are printed. The information entered in UDI Code-2 prints below the Product Description on the Sales Order.
- For more information on User Defined Info, click here.
Whether the UDI template has 'hard coded' text or 'open' text, the information is available to the Operator:
Manufacturer Info:
- The Manufacturer Info fields capture information for internal use only. These fields are designed for cases where the original manufacturer of a product is not the supplier from which you purchase.
- Code - enter or select from the Query the appropriate Supplier code (even though you may never purchase directly from the manufacturer).
- Memo - the 20 character Manufacturer Memo field is used to store a short memo related to the manufacturer in cases where the original manufacturer of the product is not your supplier.
IM13/Miscellaneous Folder
