Print Outstanding RMA Report (IN68)
The Print Outstanding RMA Report (IN68) prints a list of outstanding RMAs in summary or with all detail lines.Follow these steps to run IN68:
- The Printer Selection screen automatically opens. Select the device destination and click OK.
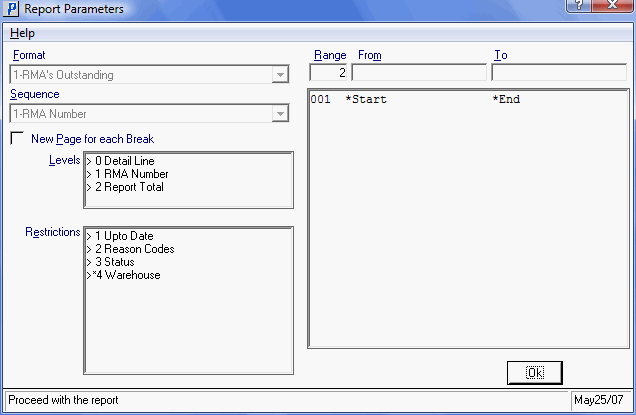
- The Report Parameters screen for IN68 opens.
- The Format field defaults to 'RMAs Outstanding'. You cannot modify the Format field.
- The Sequence field defaults to 'RMA Number'. You cannot modify the Sequence field.
- If a New Page for each Break is required, select the check box.
- The Levels list box displays the various Levels of detail available for the report. All Levels are automatically selected in IN68; the '>' before each Level option indicates the Level is selected. Double click on the line to remove the selector. IN68 includes the following Levels:
- Detail Line
- RMA Number
- Report Total
- Select the Restrictions that apply to the Outstanding RMA Report by double clicking on the line in the list box. Restrictions allow you to tailor IN68 to your specific needs. The '>' before a Restriction indicates the Restriction is selected. Once a Restriction is selected, it can be de-selected but the '>' remains. An '*' before a Restriction means the Restriction is mandatory. IN68 includes the following Restrictions:
- Upto Date - enter or select from the query a 'Print up to date' for the report. RMAs dated on or before this date will print on the Report.
- Reason Codes - double click on the Reason Code(s) required for the report. Click OK when all Reason Codes are entered. To remove the Reason Codes, double click on the code again.
- Status - double click on the Status code(s) required for the report. Click OK when all Status codes are entered. To remove the Status codes, double click on the Status code again.
- Warehouse - the 'All Warehouses' check box is selected and is unavailable. To select a single Warehouse, enter or select from the query the Warehouse number in the Warehouse Code field. The 'All Warehouses' check box becomes available for selection again.
Note: To modify a Restriction once it is set up, reselect the Restriction and make the necessary changes.
- Upto Date - enter or select from the query a 'Print up to date' for the report. RMAs dated on or before this date will print on the Report.
- Select the Range From and To for the report. The Range must match the Sequence selected; since the only Sequence available is RMA Number, you must enter RMA numbers in the To and From fields. Multiple Ranges may be entered.
- In the From field, enter the starting 'code' for the report.
- In the To field, enter the ending 'code' for the report.
- The information displays in the list box below.
- To add additional Ranges, repeat these steps.
Note: To print the entire file (all RMAs), simply tab through the From and To fields. The list box displays *Start and *End in the From and To fields.
- To delete a Range from the list box, double click on the line. The following message displays, "Do you wish to delete this range? Yes/No". Click Yes to delete the range.
- In the From field, enter the starting 'code' for the report.
- When all of the information on the Report Parameters screen is complete, click OK to run the report.
- The Format field defaults to 'RMAs Outstanding'. You cannot modify the Format field.
- The Report Complete screen opens when the report is generated. Click OK to accept the report, Restart to restart the printing of the report, or Abort to cancel the report.

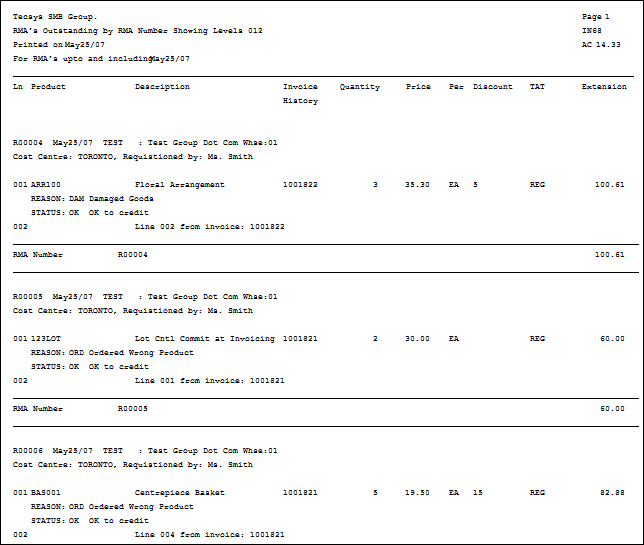
Sample of Print Outstanding RMA Report (IN68)

Report Parameters Screen for IN68
