How to Create a Role
The purpose of a role in PointForce iTopia is to define job functions, with associated authority and responsibilities, within the context of an organization. Each role contains individual and/or group resources that are assigned permissions. Roles are then assigned to users.In this topic we will create a new role. You can click on the links above for help on assigning resources to roles and assigning roles to users.
To create a new role, you must be logged in as the system administrator.
- You create a role using the Roles (md_role) view. To open the Roles view, enter role in the search field on the home menu page and then click Go.
- Click Create.
- The Roles > Create page opens.
- In the Role Name field, enter the new role name. In this example, our role name is pfitopia_customer.
-
Note: When assigning role names, we recommend that you prefix the role with your client code followed by a short description of the role. Roles created by TECSYS all begin with ibis. Creating roles that begin with your client code will enable you to differentiate the role names. In addition, we recommend that you separate each group of text in the role name with an underscore.
In this example, pfitopia is the client code and customer (orders only) is the role.
- When the role name is entered, click Continue.
- A second Role & gt; Create page opens. The Description field defaults to the role name. You can override this as required.
- Click Submit.
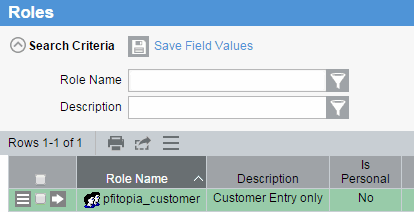
- On the Roles view, you can see the role we just created:


